In the world of cybersecurity, protecting your data is of utmost importance. Snowflake’s Key Pair Authentication is a powerful tool that adds an extra layer of security to your systems. If you’re new to this, fear not! This step-by-step guide will walk you through creating key pairs, setting up a user, and configuring Snowflake for enhanced security.
Snowflake Key Pair Authentication Guide
In this tutorial we will show you how to setup a Snowflake’s Key Pair Authentication using OpenSSL and creating rsa keys and altering the user to have public key paird.
Step 1: Download and Install OpenSSL
1. **Visit the OpenSSL Website:**
Go to [openssl.org](https://www.openssl.org/) and navigate to the “Downloads” section.
2. **Choose the Right Version:**
Download the appropriate version of OpenSSL for your operating system (Windows, macOS, or Linux).
3. **Installation:**
Follow the installation instructions provided for your specific operating system.
OR you can download the zip from here
Once you download the openssl make sure you have the command prompt opened from that path.
Check if OpenSSL is ready in your machine. Unzip the openSSL folder and open command prompt from there
C:\Users\username>openssl
‘openssl’ is not recognized as an internal or external command,
operable program or batch file.C:\Users\username>cd C:\Users\username\Downloads\openssl-0.9.8e_X64\bin
C:\Users\username\Downloads\openssl-0.9.8e_X64\bin>openssl
OpenSSL>
Step 2: Generate a Key Pair
1. **Open a Terminal or Command Prompt:**
Launch the terminal or command prompt on your machine.
2. **Generate Private and Public Key:**
Type the following command to generate a private and public key
openssl genrsa 2048 | openssl pkcs8 -topk8 -inform PEM -out rsa_key.p8 -passout pass:$Password
openssl rsa -in rsa_key.p8 -pubout -out rsa_key.pub -passin pass:$Password
Without password
openssl genrsa 2048 | openssl pkcs8 -topk8 -inform PEM -out rsa_key.p8 -nocrypt
openssl genrsa 2048 | openssl pkcs8 -topk8 -v2 des3 -inform PEM -out rsa_key.p8
Step 3: Create a Snowflake User
1. **Log in to Snowflake:**
Access your Snowflake account and log in.
2. **Access SQL/Snowsite Editor:**
Open the SQL editor in Snowflake.
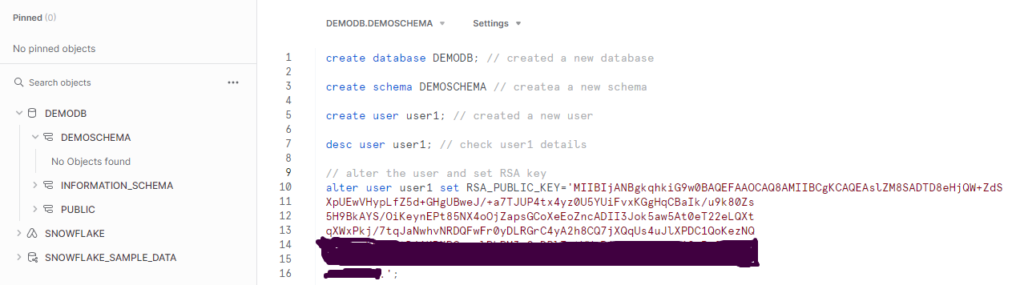
3. **Create a User:**
Execute the following command, replacing ‘your_username’ with your chosen username:
CREATE USER your_username;
Step 5: Assign Public Key to Snowflake User
1. **Alter User Command:**
Execute the ALTER USER command to associate the public key with your Snowflake user. Replace ‘your_public_key’ with the content of your public key file:
ALTER USER your_username SET RSA_PUBLIC_KEY=’your_public_key.’;
### Step 6: Verify the Setup
1. **Retrieve Public Key Fingerprint:**
Execute the following commands to retrieve and verify the user’s public key fingerprint:
DESC USER your_username;
Look for the ‘RSA_PUBLIC_KEY_FP’ value.
Compare the outputs to ensure correct configuration.
Congratulations! You’ve successfully set up Snowflake Key Pair Authentication. Now, your Snowflake user can securely access your data with the added protection of cryptographic key pairs.
2 thoughts on “A Beginner’s Guide to Snowflake Key Pair Authentication”